Breakfast & Brunch
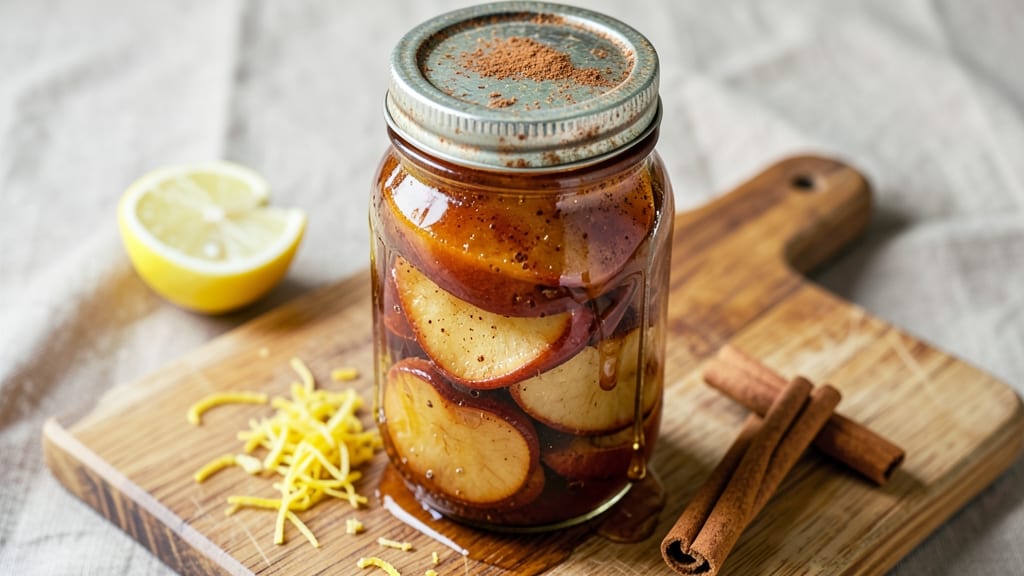
Canning cinnamon apples transforms seasonal fruit into year-round comfort with just a few simple steps and a touch of spice. The warm, aromatic blend of cinnamon and apples creates a preserve that tastes like autumn in every jar—perfect for topping yogurt, oatmeal, or baked goods.
I developed this recipe after realizing how quickly fresh apples disappear from markets, and canning ensures you always have that cozy flavor on hand.
This method preserves both the natural sweetness of the apples and the deep warmth of cinnamon, creating a texture that's tender yet slightly firm. The process involves peeling, coring, and slicing apples uniformly, then simmering them with cinnamon until they soften just enough to hold their shape.
Sterilizing jars properly is the key to safe, long-lasting storage—no guesswork, just reliable results.
What you'll end up with is a jar of spiced apples that tastes fresh from the orchard but stays shelf-stable for months. The cinnamon infuses the apples with a subtle, comforting sweetness that pairs beautifully with yogurt, ice cream, or even savory dishes like pork chops.
Each jar becomes a versatile ingredient for breakfast, dessert, or snacking straight from the pantry.
Whether you're a seasoned canner or trying this for the first time, the step-by-step instructions make it approachable. Safety comes first, so we'll cover proper sterilization and sealing techniques to ensure your preserved apples stay perfect for up to a year.
Let's preserve that autumn flavor for whenever you crave it.
Ingredients for cinnamon apples canning
Six ingredients, six jars of autumn in a bottle—simple, spiced, and shelf-stable.
| Ingredient | Amount | Notes |
|---|---|---|
| Apples (Firm Varieties) 🍎 | 4 lb | Honeycrisp or Granny Smith preferred |
| Granulated Sugar 🍚 | 2 cups | White or light brown preferred |
| Ground Cinnamon 🌶️ | ¼ cup | High-quality, fresh ground |
| Lemon Juice 🍋 | ½ cup | Freshly squeezed, unsweetened |
| Water 💧 | 1 ½ cups | Filtered preferred |
| Pectin (Ball RealFruit) 🍬 | 1 package | For proper gelling |
| Canning Salt 🧂 | ¼ tsp | Non-iodized preferred |
| Pint-Sized Canning Jars 🍯 | 6 whole | Mason jars with lids |
| Apple Peeler/Corer 🔪 | 1 whole | For uniform slices |
| Baking Soda 🧴 | 1 tbsp | For jar sterilization |
| Cloves 🌿 | 2 whole | Optional for extra spice |
The apples are everything here—Honeycrisp or Granny Smith hold their shape best after canning. Local orchards or grocery store bins usually have these varieties in season, but avoid anything mealy. I always buy a few extra pounds since peeling and coring takes time. If you're short on time, pre-peeled apples from the salad bar work too (just skip the coring step). For the cinnamon, Penzeys or bulk bins have the freshest ground—pre-packaged can taste stale after a few months. And don't skip the lemon juice; it keeps those pretty colors and adds brightness that balances the sweetness.
No Honeycrisp? Fuji or Braeburn are solid backups—they just soften a bit faster. Running low on sugar? Substitute honey at a 1:1 ratio, but reduce water by 0.25 cups since honey's thicker. The pectin is non-negotiable for that perfect gel texture—Ball RealFruit or Sure-Jell are the gold standards. Short on cloves? Extra cinnamon or a pinch of nutmeg works just as well. And if you're canning a big batch, double the recipe—just make sure you've got enough jars sterilized. The baking soda trick for jars? Boil them 10 minutes with 1 tbsp baking soda—keeps them sparkling clean and ready for filling.
These jars stay perfect for up to 12 months if sealed properly. I always label mine with the date and contents—masking tape and a Sharpie work great. Store in a cool, dark place (like your pantry) away from heat. Reheat gently in the microwave or on the stovetop—30 seconds for softness. The first jar out of the pantry always feels like a hug. And if you make more than you can use? Gift them—everyone loves homemade cinnamon apples.
Why You'll Love This Recipe
- No-Fuss Canning: I swear by this recipe because it’s basically foolproof—just peel, core, and slice apples into jars, then pour the warm cinnamon-sugar syrup. No fancy equipment, no stress, and the whole process fits into a single afternoon.
- Warm Spice Magic: That first bite of spiced apple? Pure comfort. The cinnamon caramelizes just enough to coat every slice, while the lemon juice keeps the flavor bright—not too sweet, not too heavy. It’s the kind of taste that makes you reach for a second jar without thinking.
- Pantry Staple Power: Honestly, this recipe uses ingredients you already own—apples, sugar, cinnamon, lemon. No specialty items, no last-minute grocery runs. And once you’ve got the jars filled, they’ll keep for months, meaning you’re always ready for holiday gifts or last-minute hostess favors.
- Year-Round Treat: Between us, summer’s apple harvest feels like a gift you can stretch all year. These jars taste like autumn even in July, and they’re perfect for breakfast toast, dessert toppings, or a quick snack when the kids come home hungry. (Yes, even on a Tuesday night.)
Step-by-step instructions for cinnamon apples canning recipe
Here's how to preserve that cozy cinnamon-spiced flavor all year long.
👨🍳 Step 1: Prepare the Apples for Canning
Start by peeling and coring the 4 lb of apples using the apple peeler/corer. I like to cut them into ¼-inch thick slices for even cooking and consistent texture. You'll want to work quickly once the apples are sliced—they oxidize fast, turning brown. To prevent this, place the sliced apples in a large bowl and sprinkle them with the 0.5 cup of lemon juice. Toss gently to coat all the slices evenly. This acidity also helps preserve the vibrant color and enhances the flavor.
While the apples soak, prepare your canning jars. Fill each of the 6 pint-sized canning jars with the 2 whole cloves (if using) and set them aside. The cloves add subtle warmth that pairs beautifully with the cinnamon. I like to place one clove at the bottom of each jar before adding the apple slices—this ensures even distribution of flavor throughout the preserves.
🍳 Step 2: Create the Spiced Sugar Syrup
In a large saucepan, combine the 2 cups of granulated sugar, 0.25 cup of ground cinnamon, 1.5 cups of water, and 0.25 tsp of canning salt. Stir over medium heat until the sugar completely dissolves. You'll see the mixture bubble gently—this is when you know it's ready for the next step. Let the syrup simmer for 5 minutes to allow the cinnamon to infuse fully. The aroma will fill your kitchen with that comforting cinnamon scent that makes canning worth the effort.
While the syrup simmers, add the drained apple slices to the jars. Pack them tightly but not too forcefully—you want to leave about ½-inch headspace at the top of each jar. This space allows for proper heat penetration during processing and prevents jars from sealing incorrectly. I like to use a wooden spoon to press down gently on the apples in each jar, ensuring they're settled evenly.
🥘 Step 3: Fill Jars and Process for Safe Preservation
Carefully ladle the hot cinnamon syrup over the apple slices in each jar until they're covered by about ¼-inch. The liquid should completely cover the apples, preventing mold growth and ensuring a safe seal. Wipe the rims of the jars with a clean, damp cloth to remove any syrup residue—this helps create a proper seal during processing. Place the lids on the jars and screw on the bands until they're fingertip tight.
Prepare your canning equipment by bringing a large pot of water to a boil. Use the 1 tbsp of baking soda to sterilize the jars by adding it to the boiling water—this helps prevent any contamination during the canning process. Once the water reaches a full rolling boil, carefully lower the jars into the pot using a jar lifter. The jars should be completely submerged in the water, with at least 1 inch of water covering the tops. Process the pint jars for 15 minutes—this timing ensures the apples are safely preserved while maintaining their texture and flavor.
⏰ Step 4: Cool, Check Seals, and Store
After the 15-minute processing time, carefully remove the jars from the boiling water using tongs and place them on a clean towel. Let them cool undisturbed for 12-24 hours—this allows the lids to seal properly. You'll know a jar has sealed correctly when the lid curves downward and makes a popping sound when pressed. If any jars don't seal, refrigerate them and use them within a week or reprocess them with new lids.
The sealed jars can be stored in a cool, dark place for up to 1 year. The cinnamon apples will retain their vibrant color, tender texture, and that warm, spiced flavor that makes them perfect for topping yogurt, oatmeal, or even desserts. The first time you open a jar and smell that familiar cinnamon aroma, you'll know all your effort was worth it—this is comfort food preserved just for you.
Pro Tips For Making Cinnamon Apples Canning
- USE PEELING TWICES: Peel and core your apples twice—once before slicing, once after. The first pass removes the tough outer skin, the second scrape gets rid of any lingering bitter pith near the core. I learned this the hard way when my first batch tasted like a tree branch.
- STERILIZE JARS HOT: Fill your jars with boiling water for at least 10 minutes before filling them with syrup. Cold jars cause the hot filling to cool unevenly, which is how mold finds its way in. Trust me, you don’t want to open a jar in six months and find a fuzzy surprise.
- SKIP THE OVERFILLING: Leave at least a half-inch headspace between the apple slices and jar rim. Apples release liquid as they cook, and overfilling leads to messy jars that won’t seal properly—or worse, explode when processed. Measure with a ruler, not your eyeball.
- SWEAT THE APPLES FIRST: Simmer the apple slices in water for 5 minutes before adding sugar and cinnamon. This softens them slightly and prevents them from turning mushy later. I used to skip this, and my apples always ended up either rock-hard or falling apart—now they’re just right.
Common mistakes when making this recipe
Skipping Sterilization
One of the biggest mistakes is skipping the sterilization step entirely. I’ve seen people rush through canning and end up with jars that don’t seal properly or worse—contamination. Always sterilize your jars by boiling them in water with 1 tbsp baking soda for 10 minutes before filling.
This kills bacteria and ensures a clean environment for your preserves. The baking soda also helps remove any residue that could interfere with sealing. 💡
Incorrect Headspace
Leaving too little or too much headspace in your jars can ruin the seal. The recipe calls for ½-inch of space at the top—this is critical for safe processing. Too little headspace can cause jars to burst, while too much can prevent proper sealing.
Use a headspace gauge or a ruler to measure accurately. I like to tap jars gently on the counter to help settle the apples evenly before adding syrup.
Underprocessing Jars
Cutting processing time short is a recipe for disaster. The 15-minute processing time for pint jars is non-negotiable—it’s what ensures your cinnamon apples are safe to eat for up to a year. I’ve seen beginners pull jars out early because they’re impatient, but this can lead to spoilage.
Use a timer and resist the urge to peek! The jars need that full time to reach the proper internal temperature.
Using Old or Damaged Lids
Old or dented lids won’t seal properly, no matter how perfect the rest of your process is. Always use new lids for canning—even if they’ve been stored for years. Check for dents or rust before sealing.
I keep a supply of Ball or Kerr lids on hand and replace them every few years. Reusing lids is a common mistake that can lead to failed seals and wasted effort.
Overfilling Jars
Packing jars too tightly leaves no room for the syrup to cover the apples completely. This creates a breeding ground for mold and bacteria. The syrup should cover the apples by at least ¼-inch—this ensures they’re fully submerged and protected.
I like to use a slotted spoon to press apples down gently, leaving just enough space for the syrup to flow in.
Ignoring the Lemon Juice
Skipping the 0.5 cup lemon juice is a flavor and safety mistake. The acidity helps preserve the apples’ color and prevents spoilage. It also balances the sweetness of the cinnamon syrup.
If you’re short on time, fresh lemon juice works best—powdered won’t give the same bright flavor. The juice also acts as a natural preservative, keeping your canned apples fresh longer. 🍋
Nutrition facts
Frequently asked questions
Can I use any type of apple for this canning recipe?
Firm varieties like Honeycrisp or Granny Smith work best—they hold their shape during canning. Softer apples like Gala or Fuji may turn mushy. If you're short on time, pre-peeled apples from the salad bar work too, but skip the coring step. The key is avoiding mealy apples that won't hold texture after processing.
How do I know when my cinnamon apples are properly sealed?
After cooling for 12-24 hours, check for a concave (downward-curving) lid with no give when pressed. A sealed jar will also make a popping sound when pressed near the center. If a jar doesn't seal, refrigerate it and use within 1 week or reprocess with a new lid. Never eat from a bulging or leaking jar—this indicates spoilage.
Can I adjust the sweetness level in this recipe?
Yes! For less sweetness, reduce sugar to 1.5 cups and add 0.25 cup honey (adjust water by -0.25 cup). For extra spice, add ¼ tsp nutmeg or 3 star anise pods to the syrup. The cinnamon-to-sugar ratio is flexible, but maintain at least 1 cup sugar per 2 cups syrup for proper gelling. Taste the syrup before canning to adjust!
How long do canned cinnamon apples last?
Properly sealed jars last up to 12 months in a cool, dark pantry. After opening, refrigerate and use within 2 weeks. The lemon juice and processing time create an acidic environment that prevents spoilage. Label jars with the date—if you see mold or off smells after opening, discard immediately. The flavor actually improves after a few months of aging!
What are the best ways to use canned cinnamon apples?
These versatile preserves work perfectly as a topping for yogurt, oatmeal, or ice cream. Warm them gently in a skillet for 2-3 minutes to serve over pancakes or waffles. They also shine in baked goods—fold into muffins or layer in pies. For savory dishes, try them alongside pork chops or sausages. The cinnamon flavor pairs surprisingly well with cheese platters too!